
Spring Security (1) - 介紹及應用
相信大家應該作為軟體工程師都知道資訊安全的重要性,如果你寫好一個系統,沒有受到好的資安控管,容易成為駭客下手的目標。特別是許多網頁或應用程式都建立在會員系統的基礎之下,這些資訊對於認證(authentication)與授權(authorization)控管相當重要,認證就相當於帳號登入,對系統表示自己是個合法的使用者。而授權則是系統允許該使用者存取某服務,看到特定頁面或是功能等等,也就是存取 API 許可。Spring Security 就提供了這部分的支援讓我們能夠輕鬆整合到 Spring Boot 專案中。
介紹
Spring Security 是 Spring Boot 框架中的提供的一個資訊安全模組,能夠靈活的配置來有效保護 Web 應用程序免受各種安全威脅,主要有下面這些特色:
- 快速整合:Spring Boot Security 可以通過簡單的配置快速整合到 Spring Boot 應用中。
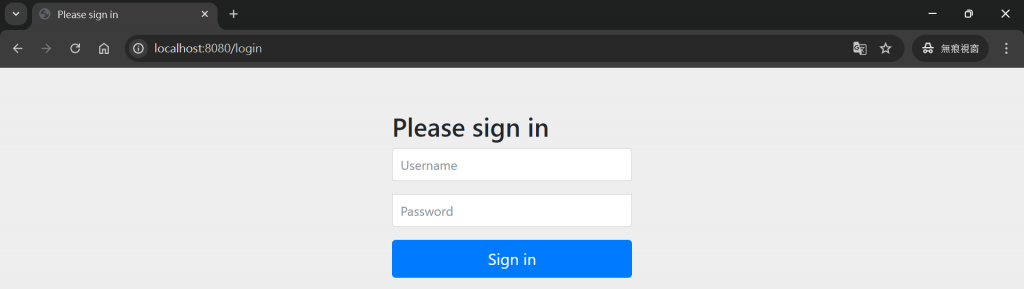
- 預設安全性:即使沒有進行任何配置,它也能為應用程序提供基本的安全防護,包括預設的登入頁面和認證方法 。
- 靈活配置:開發者可以根據需求自定義安全設置,如用戶認證、授權規則等 。
- 角色權限訪問控制(RBAC):允許根據用戶角色設置不同的訪問權限。
- **過濾器鏈(FilterChain)**:使用一系列過濾器來處理 HTTP 請求,實現各種安全功能 ,像是 JWT。
引入 SpringBoot Security
在 pom.xml 加入
1 | <dependency> |
簡單測試預設配置
可以啟動看一下目前 Security 幫我們做了什麼事情,你會發現什麼都還沒配置就可以將你的 API 加上一層防護,並且給你一個預設的登入頁面跟預設的相關認證登入的配置。
如果要測試目前登入及認證就用他預設的帳號密碼,預設帳號為 user ,密碼會顯示在 console,可以使用來登入看看。

你可以自己建立一個 API 接口測試看看,成功登入後就可以順利獲取各端口的資源,我這邊規劃設計方向是電商,可以有買家賣家的可獲取的頁面。
1 |
|
這邊有放一個小彩蛋,就是 Authentication 這個物件,只要成功認證就可以透過這個物件取得使用者的相關資>訊,我就拿來印出 username,之後的文章會講到更多。
自定義配置
Config
預設配置通常也不是我們希望使用的,我們可以建立一個配置 class (名稱自訂),我就叫 SecurityConfig 並且套上 @EnableWebSecurity, @Configuration,這樣就可以讓 Spring Security 認定這個配置,並幫我們套用我們自定義的配置。
InMemoryUserDetailsManager
第一件事情我們可以建立幾個預存的使用者,並且設置權限,後續會再實際連結自己的資料庫。
大家先有個概念 UserDetails 這個主要是 Security 用來針對帳號密碼驗證需要的重要物件,其中 Security 預設有提供一個 InMemoryUserDetailsManager 介面實作 UserDetailsService 及 UserDetailsManager ,可以用來管理 UserDetails 並預存在記憶體中提供我們可以直接使用。
我們可以自己設定需要用的 user 帳號密碼還有權限等等
1 |
|
因為是自己練習,所以是可以用 withDefaultPasswordEncoder是不使用任何 PasswordEncoder,但目前官方不推薦,畢竟一般設計密碼是不可以原文儲存的,這邊也提供建議的寫法,可判斷加密類型,參考上面 seller 和 admin 的寫法,需要在密碼前面加上前綴,Security 會自動判斷要使用哪種演算法來驗證。
| 前綴 | 演算法 | 密碼原文 | security 參數寫法 |
|---|---|---|---|
| {noop} | 不加密 | seller | {noop}seller |
| {bcrypt} | BCrypt | admin | {bcrypt}$2a$12$Z/TYK22AUhfoswp6/24GWOcyspUMGX9lYht6nytvzrDrbRDOzk6BC |
| {sha256} | SHA256 | password | {sha256}97cde38028ad898ebc02e690819fa220e88c62e0699403e94fff291cfffaf8410849f27605abcbc0 |
{noop} 的意思其實是 No Operation 和
withDefaultPasswordEncoder是一樣都不加密
SecurityFilterChain 配置授權規則
利用 SecurityFilterChain 來配置每個資源可以請求訪問的對象,也就可以控管特定權限的人能去哪,
authorizeHttpRequests 方法,用來設定進入 SecurityFilterChain 的 Request 如何授權。
requestMatchers({http method}, “url”) 這個方法可傳入 API 路徑與 HTTP 方法,並且用permitAll ,hasAnyAuthority 或 hasAuthority 選擇可以訪問的權限 (設定範圍請見下方表格)。
由於這個自定義開啟後,預設的登入頁面也就不會有,所以要重新配置 formLogin 方法,是啟用先前的登入畫面,注意需要禁用 csrf 才可以讓 Postman 作用
1 |
|
訪問權限方法作用範圍
| 方法名稱 | 作用 |
|---|---|
| permitAll | 任何狀態都可以存取 |
| hasAuthority | 需登入且具備某個特定權限才能存取。 |
| hasAnyAuthority | 需登入且具備任一個權限就能存取。 |
| authenticated | 需登入才能存取。 |
路徑匹配寫法
| 萬用字元 | 意義 | 範例寫法 | 適用 | 不適用 |
|---|---|---|---|---|
| * | 0 到多個字元 | /products/* | /products、/products/123 | /products/123/draft |
| ** | 0 到多個階層 | /products/** | 任何「/products」開頭的路徑 | - |
| ? | 1 個字元 | /products/? | /products/1 | /products/123、/products |
| ?_ 或 _? | 1 到多個字元 | /products/?* | /products/1、/products/123 | /products |
突然冒出一堆物件要配是跟方法要熟悉 😱,當初我入門的時候也是很混亂 (Security 其實就是以他底層難懂著名的…) 如果有興趣瞭解比較詳細 Security 對於登入認證的 FilterChain 運作流程可以去 Spring Security FilterChain 如何進行登入認證 有詳細說明,也比較好了解後面的一些建置流程。
不過這些配置很多都是起初建立好之後基本上就比較不會再去調整,但是大家對於底層的運作還是要有基本的概念。下一篇會介紹如何接上自己資料庫,不去使用 InMemoryUserDetailsManager 預設使用者,我們也可以建立註冊和登入功能讓我們能記錄自己的使用者。
參考資料:
- 新手工程師的程式教室 -【Spring Boot】第 17.1 課-初探 Spring Security 的認證與授權
- Udemy - Java Spring Framework 6 with Spring Boot 3
- Spring.io docs